

Mosaic++ app for iPhone and iPad
Developer: Limit Point Software
First release : 20 Nov 2014
App size: 15.53 Mb
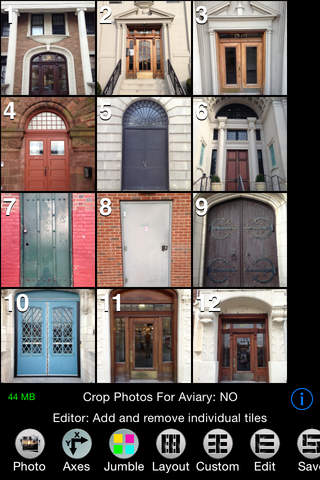
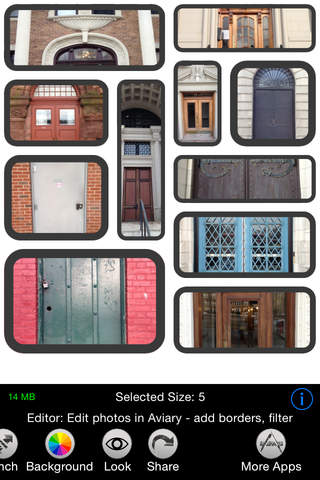
Mosaic is a versatile app that creates collages that consist of tiles, arranged according to a layout. Mosaic contains 48 built-in layouts, but you can make your own in the editor. Mosaic automatically creates icons for your custom layouts simply as a thumbnail image of that layout.
Tiles may be empty or contain a photo. When you add a photo in the main view a new tile is created with the photo as its contents. Empty tiles can be added to the collage in the editor, and in the editor you can also add photos to empty tiles, or replace a tiles current photo with a new one.
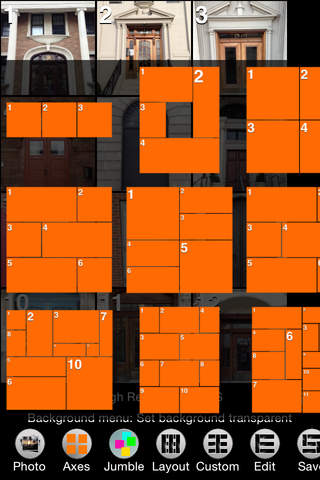
Tiles are defined in terms of a unit size, and the proportions of a tile is specified as factors of that unit size, from 1 to 10. These are called the width and height factors of the tile, and you can change them using sliders in the editor view.
As an alternative to layouts Mosaic has a feature called "Jumble". This mode of Mosaic randomly places the centers of each tile in the view. You can then drag them around within the view.
Layouts consist of collage dimensions, background color or pattern and tile spacing and all the tile data which consists of tile proportions and metadata. Metadata consists of the tiles title, border width and color, opacity (alpha), and corner size.
Title: text that is displayed as label.
Opacity: the translucency of the tile.
Border Width: defines the width of a frame for the tile.
Border Color: a color to draw the frame with, it may be partially transparent.
Corner Radius: the curvature of the corners of the frame.
The Mosaic editor is where you add and remove tiles, and set the proportions and metadata for tiles. At the top of the editor are various buttons that offer the following functionality:
+Photo: Add a photo to the selected tile.
-Photo: Remove a photo from the selected tile.
-Tile: Remove selected tile and the photo it contains.
+Tile: Add a new empty tile. The width an height of the new tile will match the values of the width (W) and height (H) sliders. You can set the slider values by tapping on an existing tile.
Crop: Crop, rotate or flip the selected tile’s photo. The “crop rect” is set to the same proportions as the selected tile, but you can change it by dragging on the corners, or move it by dragging anywhere else in the crop rect.
+Crop: Add a new cropped photo selected from the camera roll.
Aviary: Open the selected photo in the Aviary image editor. Unless the Photos menu option “Crop Photos For Aviary” is ON, the image provided to Aviary will be cropped to the proportions of the tile. This ensures that frames, text and other edits will not be cut off by the bounds of the tile. But if you selected the Look menu option Do Not Scale Photos To Fit, or Do Not Clip Photos To Bounds, then cropping for Aviary is not necessary.
Several in-app purchases extend Aviary Frames, Stickers and Effects!
Label: Edit and set the title of the tile.
Copy: Copy the photo of the selected tile to the clipboard.
Paste: Paste a photo from the clipboard into the selected tile, or a new tile if no tile is selected. The width an height of the new tile will match the values of the width (W) and height (H) sliders. You can set the slider values by tapping on an existing tile. This enables you to paste photos from other apps into the editor.
In addition to these there are the “random” buttons:
Size: Randomly set the proportions of all tiles.
Opacity: Randomly set the opacity, or alpha value, of all tiles..
Border: Randomly set the border width of all tiles.
Other controls:
Border Color: Opens a color picker to set the color the border is drawn in. The color may have its opacity set, so you can see the underlying photo if you choose a value < 1.
Corner Radius: Determines the curvature of the the corners of the tile.
Much more feature detail is provided in the app. This information is accessed in each view via the info buttons labelled with an "i".